This is the behind-the-scenes story for "Dancing with the Stairs" - a 'staircase mural' I recently completed for The Dance School in Everett WA.
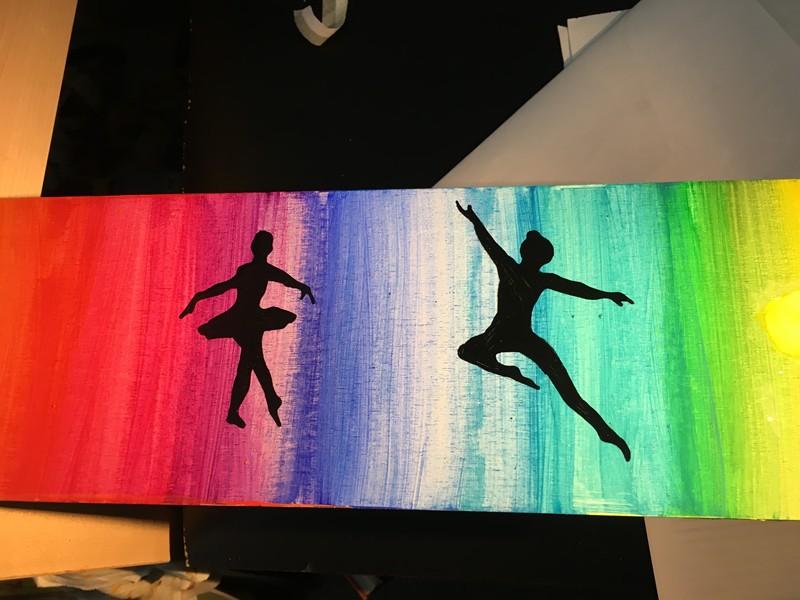
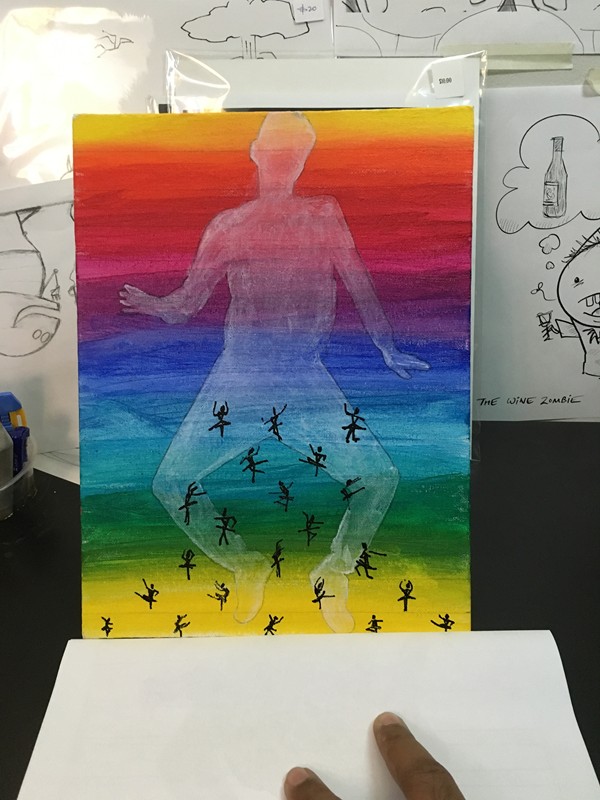
First the finished piece:
First the finished piece:
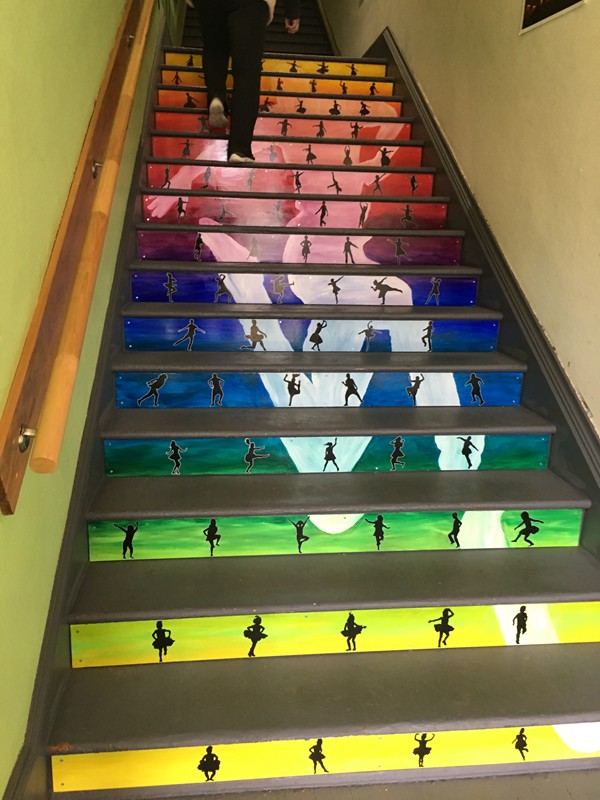
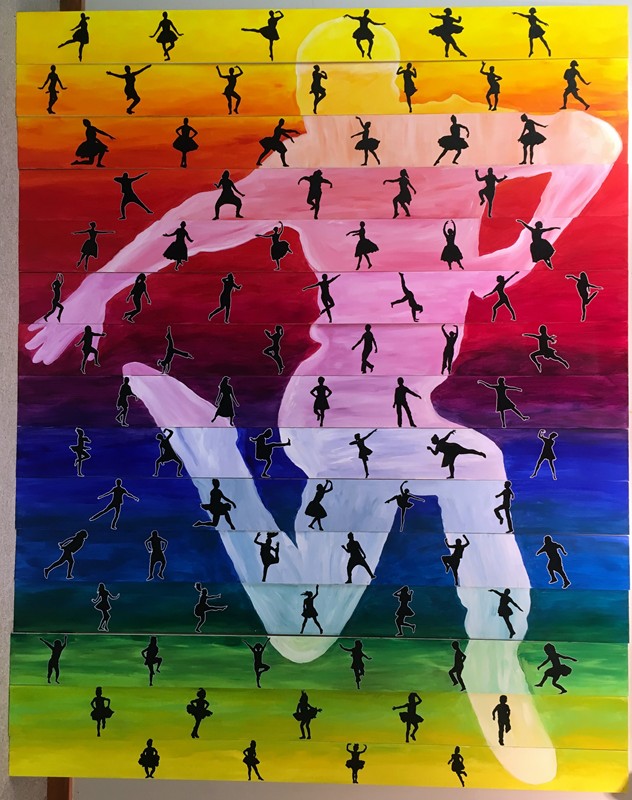
Each dancer silhouette on the mural is an actual student of the school, starting from the youngest at the bottom to the most proficient at the top (representing the student journey), while each step features a different dance class/style. The larger figure spanning (and unifying) the steps is an instructor at the school.
What does it take to create a project like this? I'm glad you asked!
It starts with a call issued by the Dance School, requesting art proposals to brighten up the entrance staircase at the school, with a request that the 15-step art be cohesive, yet each step stand individually so the school could raise funds by finding sponsors for each individual step. The art further had to express a strong connection to the school.
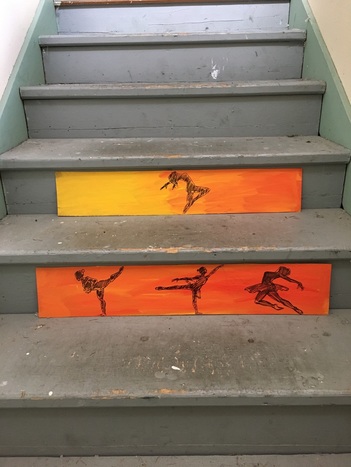
After visiting the site and taking photos, I sent in the following proposal, mocked up with clip-art:
What does it take to create a project like this? I'm glad you asked!
It starts with a call issued by the Dance School, requesting art proposals to brighten up the entrance staircase at the school, with a request that the 15-step art be cohesive, yet each step stand individually so the school could raise funds by finding sponsors for each individual step. The art further had to express a strong connection to the school.
After visiting the site and taking photos, I sent in the following proposal, mocked up with clip-art:
 |  |
Somewhat to my surprise, the proposal beat out all the competition and I was awarded the commission.
Uh-oh. Had I just proposed painting an entire staircase full of little silhouettes of actual people that were going to be about 5 inches high? Was this design even going to work?
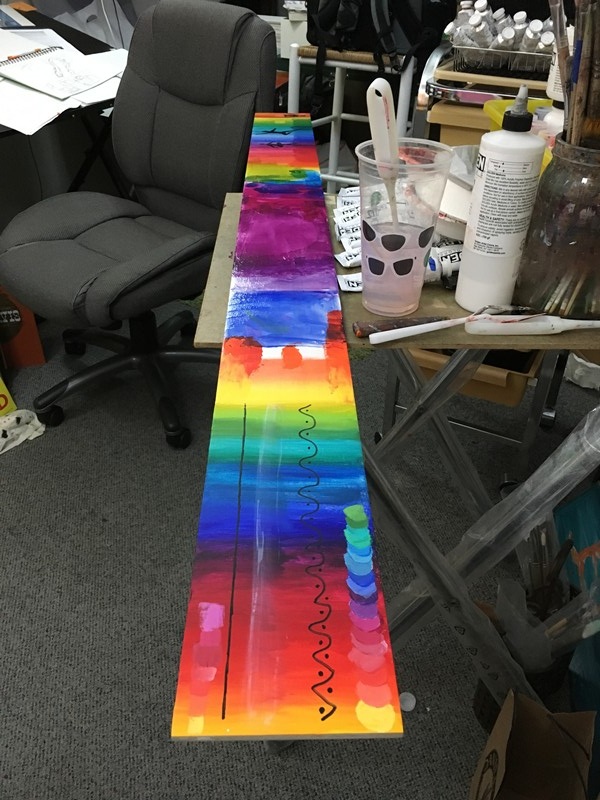
When in doubt, create a prototype! I cut up some cardboard, added some color and traced some photos from the web using a sharpie, and tested these 'dummy' panels on my studio stairs. And what do you know, it seemed to work well. 5 inches is plenty high to capture a full figure in detail. Whew, what a relief!
Uh-oh. Had I just proposed painting an entire staircase full of little silhouettes of actual people that were going to be about 5 inches high? Was this design even going to work?
When in doubt, create a prototype! I cut up some cardboard, added some color and traced some photos from the web using a sharpie, and tested these 'dummy' panels on my studio stairs. And what do you know, it seemed to work well. 5 inches is plenty high to capture a full figure in detail. Whew, what a relief!
For the project I would need custom art panels cut to fit the stairs. Back to the site for a round of careful measurements, through which process I made the unpleasant discovery that the height, width, and depth of every single step was different.
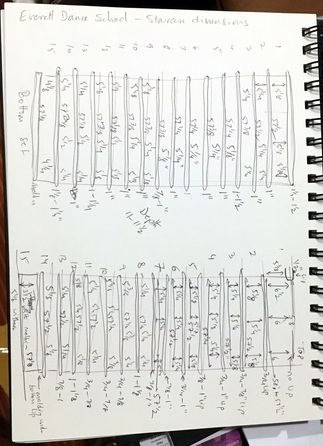
I found a local source for custom-made artist panels who recommended using 1/2 inch thick panels for each step a anything thinner could potentially warp during the painting process.
However adding a 1/2 inch panel reduces the stair depth by 1/2 inch. Would that create a potential safety hazard? Possibly. Next thing I know I am digging up building codes to understand just how much leeway I had for reducing the tread depth safely. Turns out not a lot, just 1/4 inches. (BTW When I decided to embrace art, I never imagined reading building codes would be part of that equation!)
I decided I had no choice but to accept the risk of using 1/4 inch panels and having them warp!
The blank panels arrived, and then another site visit to make sure each panel fit it's intended location. (The last thing I wanted was to paint a panel and then find it wouldn't fit). Thankfully there were no issues with panel sizes and fits - the panel creator did a great job following my specifications.
Not having painted on these kinds of panels before, I knew I needed to experiment to ensure the panel + paint combination would behave as expected. I therefore made sure to order a few extras that I could 'play' with.
What followed was a few straight weeks of experimentation with many different paints, fluids, gels, finishes and application methods to see what would work best for this project:


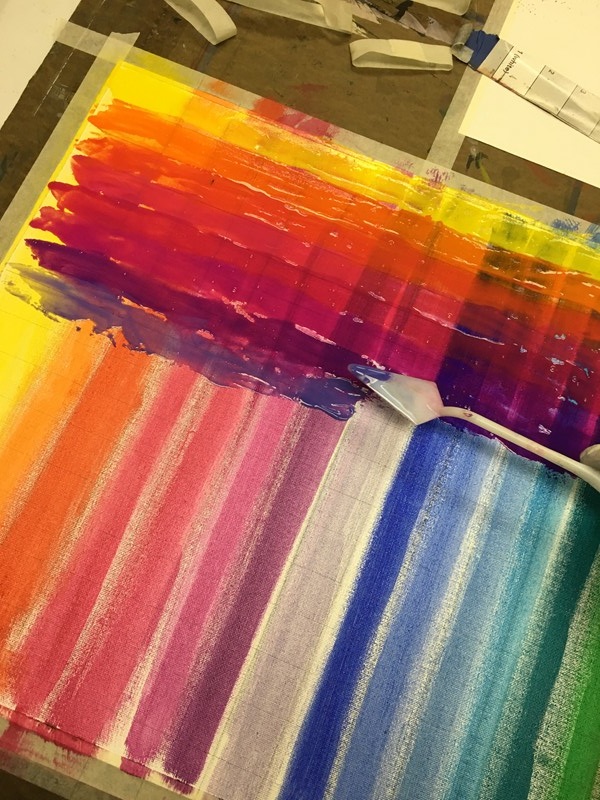
In the end I concluded, what would work best was to simply paint as I always do, using heavy body acrylic paints.
To minimize potential warping of the panels, I then took the extra precaution of coating the back of each panel with an acrylic polymer that hardens into a stiff layer. Stiffer panels should be less likely to warp (or so the theory goes).
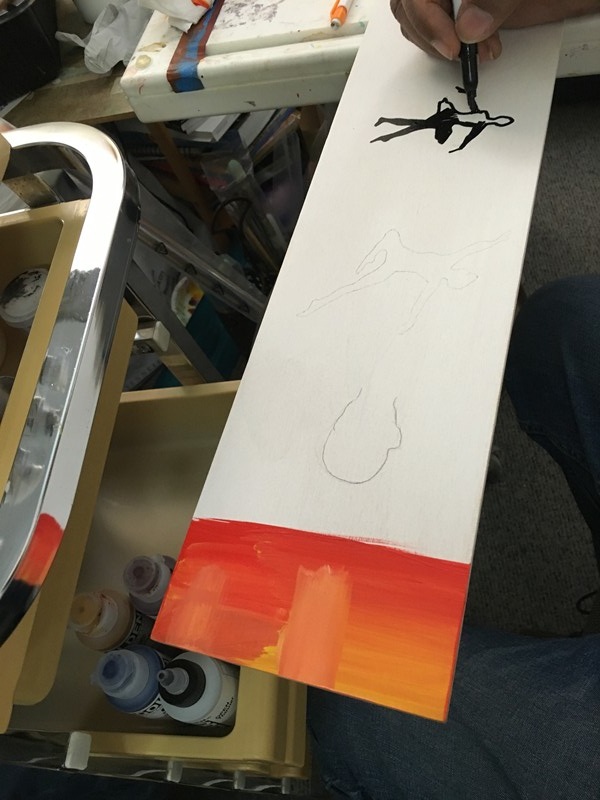
The painting process was divided into two stages:
Stage 1: Paint a 'rainbow' background on all the steps, along with the central figure.
Stage 2: Paint silhouettes of individual students
Would a rainbow spectrum actually work? Would some of the background colors be too dark? Too light? Could I control the gradations? Would silhouettes be visible against the changing background?
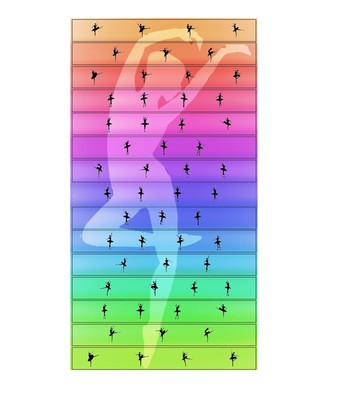
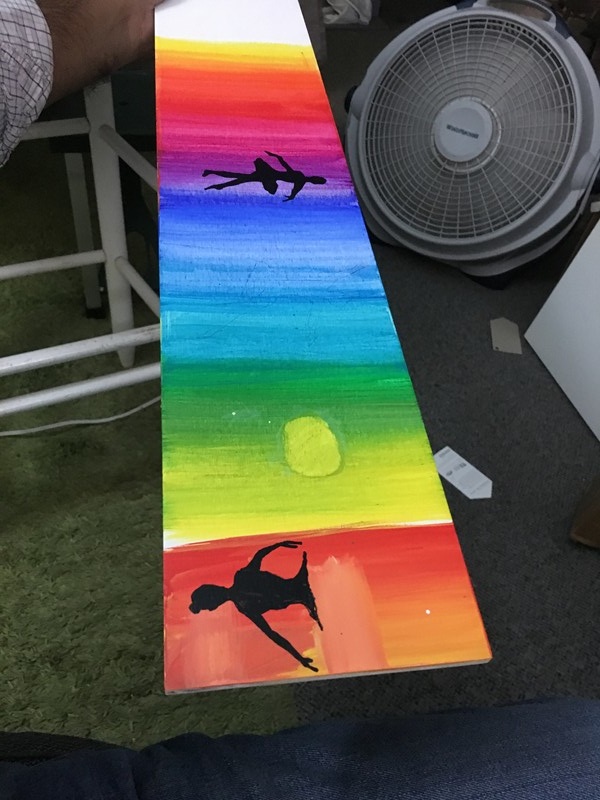
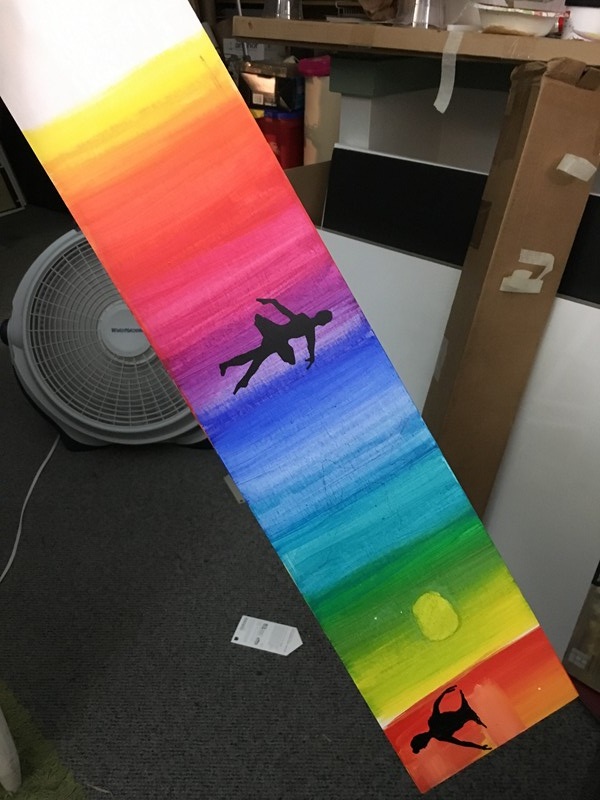
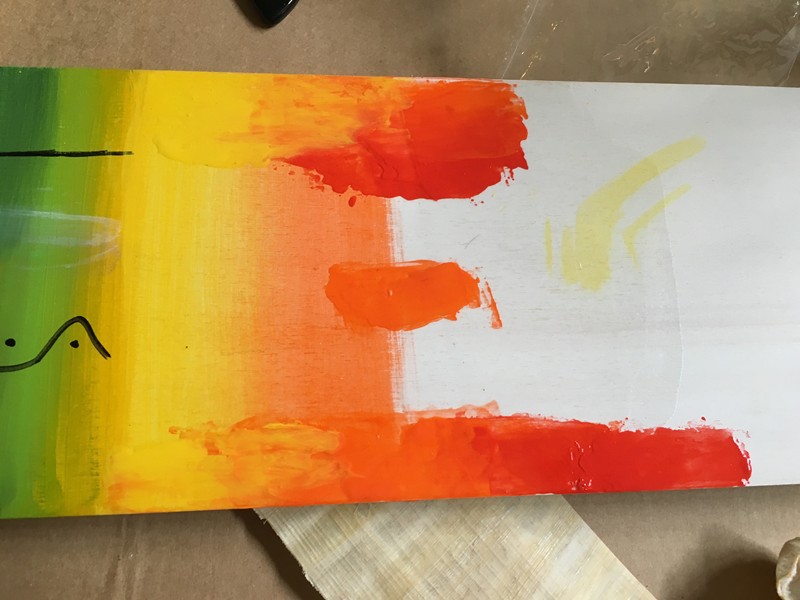
Time to do another test, this time creating a 9"x12" maquette (i.e. scale model):
To minimize potential warping of the panels, I then took the extra precaution of coating the back of each panel with an acrylic polymer that hardens into a stiff layer. Stiffer panels should be less likely to warp (or so the theory goes).
The painting process was divided into two stages:
Stage 1: Paint a 'rainbow' background on all the steps, along with the central figure.
Stage 2: Paint silhouettes of individual students
Would a rainbow spectrum actually work? Would some of the background colors be too dark? Too light? Could I control the gradations? Would silhouettes be visible against the changing background?
Time to do another test, this time creating a 9"x12" maquette (i.e. scale model):
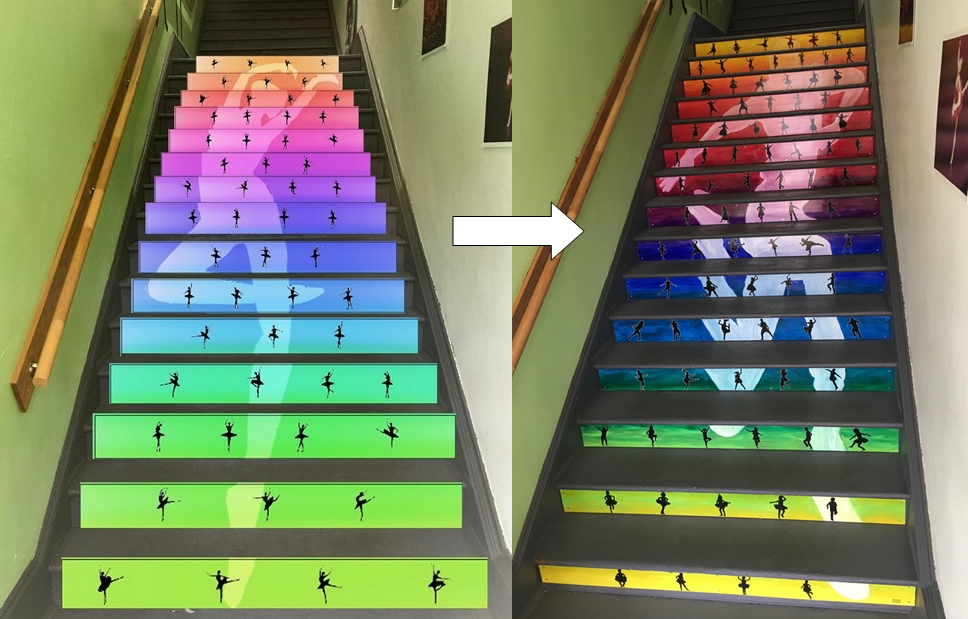
The color gradations seemed to work. However after doing this maquette I decided the background figure wasn't looking 'dancer-ly' enough, and which led to a detour to find another, more dynamic photo, which took another few weeks to resolve. Lesson: always make a scale-model folks - you'll be surprised what you learn.
 Before | 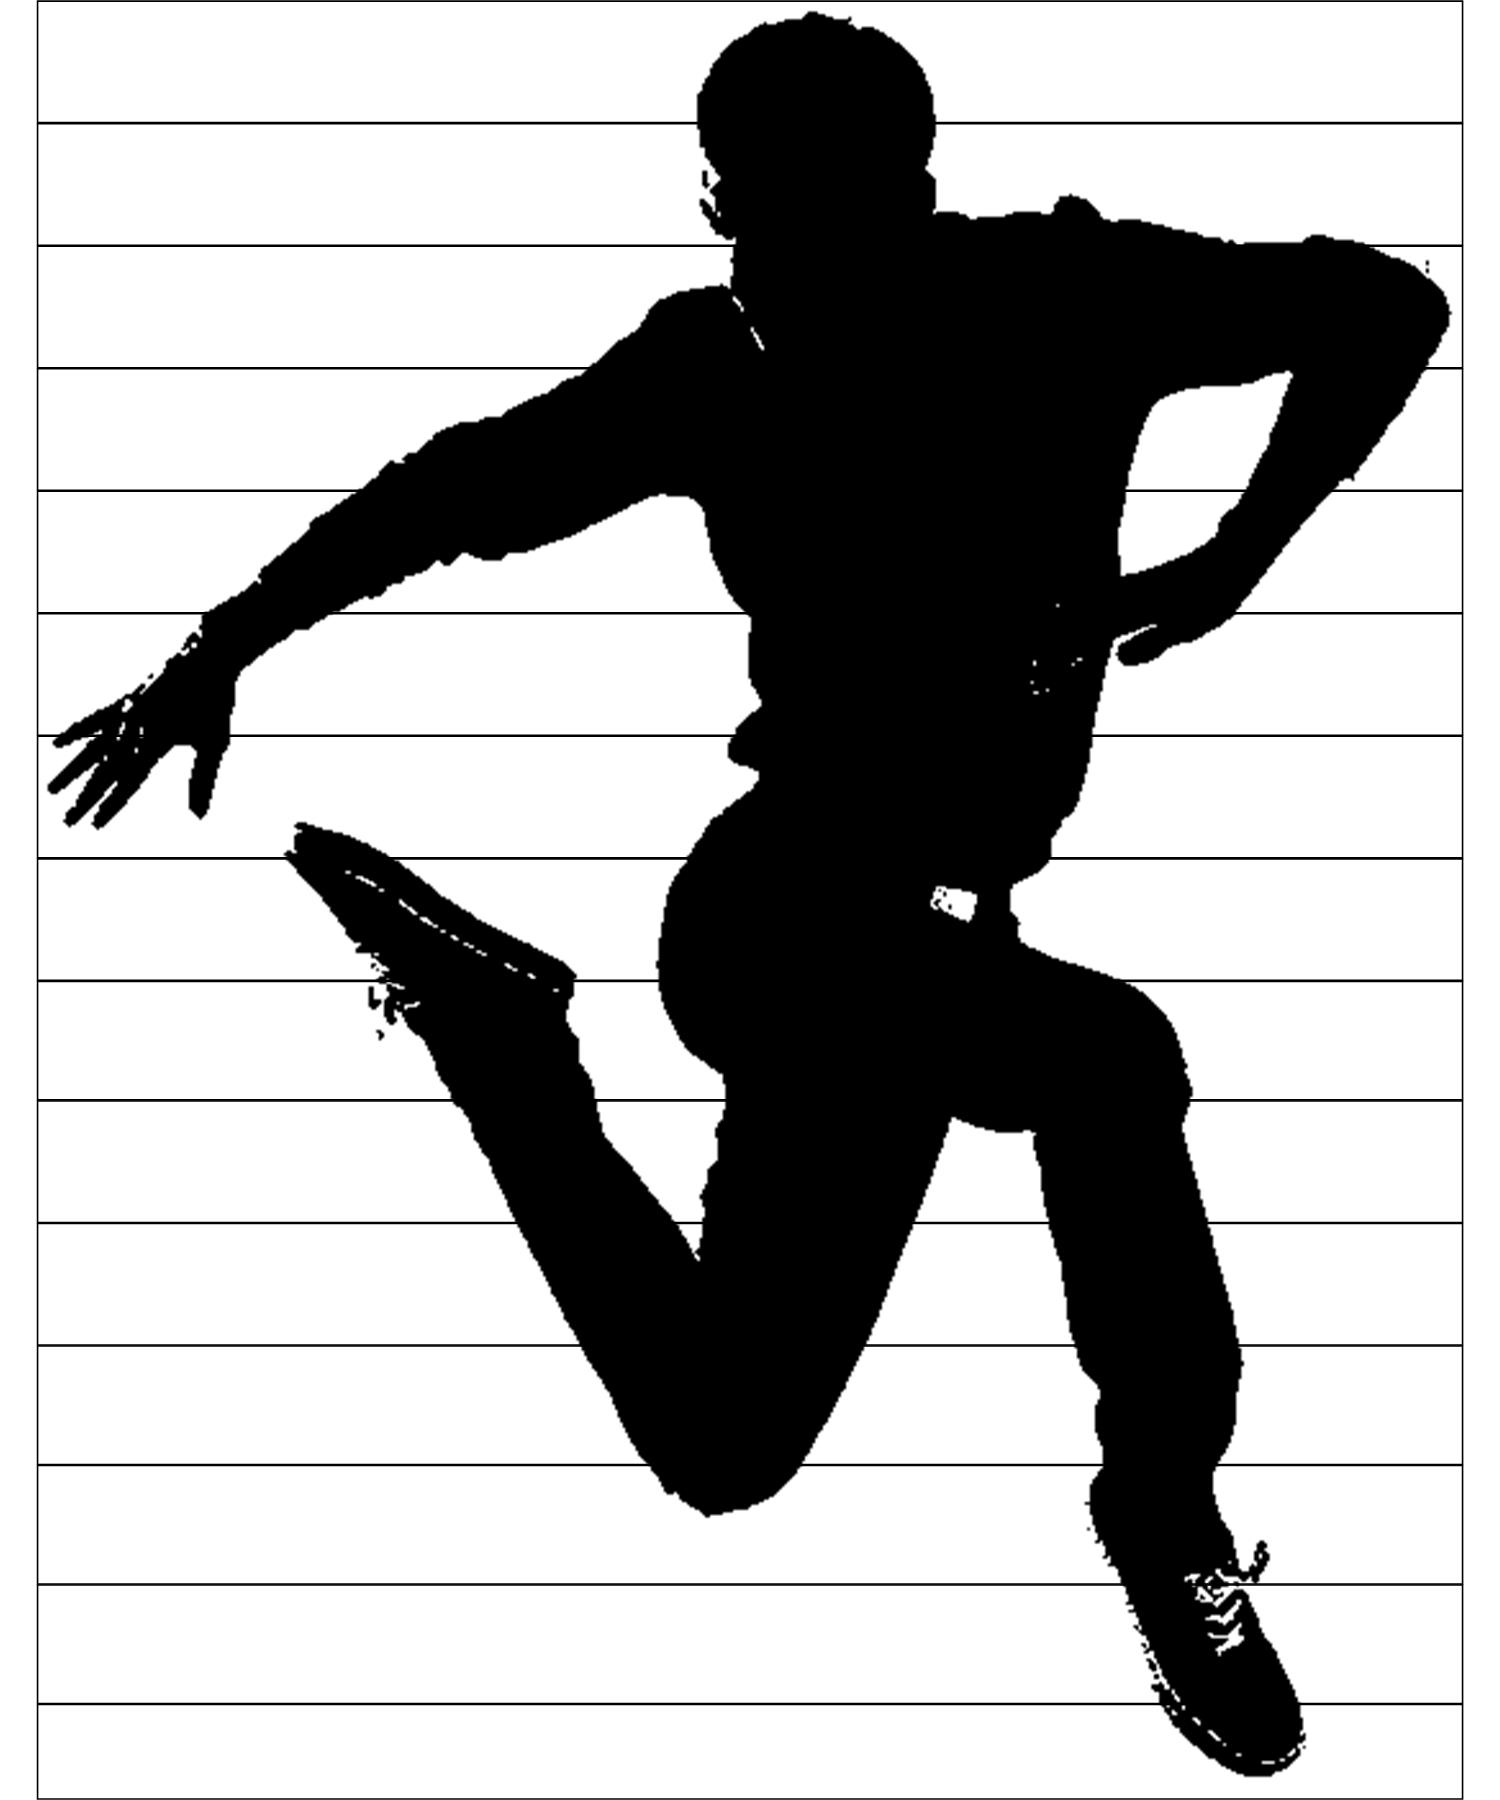 After |
(Yes it's the same person in both photos - Sam Picart, one of the school's instructors. Both silhouettes are traced from photos. First image (left) based on a photo from the Everett Herald, photographer unknown. Second image (right) based on a photo taken by Joe Lambert).
Once I had a background photo that worked, it was time to paint in the background colors into the panels. Here's a time-lapse video showing that process:
Once I had a background photo that worked, it was time to paint in the background colors into the panels. Here's a time-lapse video showing that process:
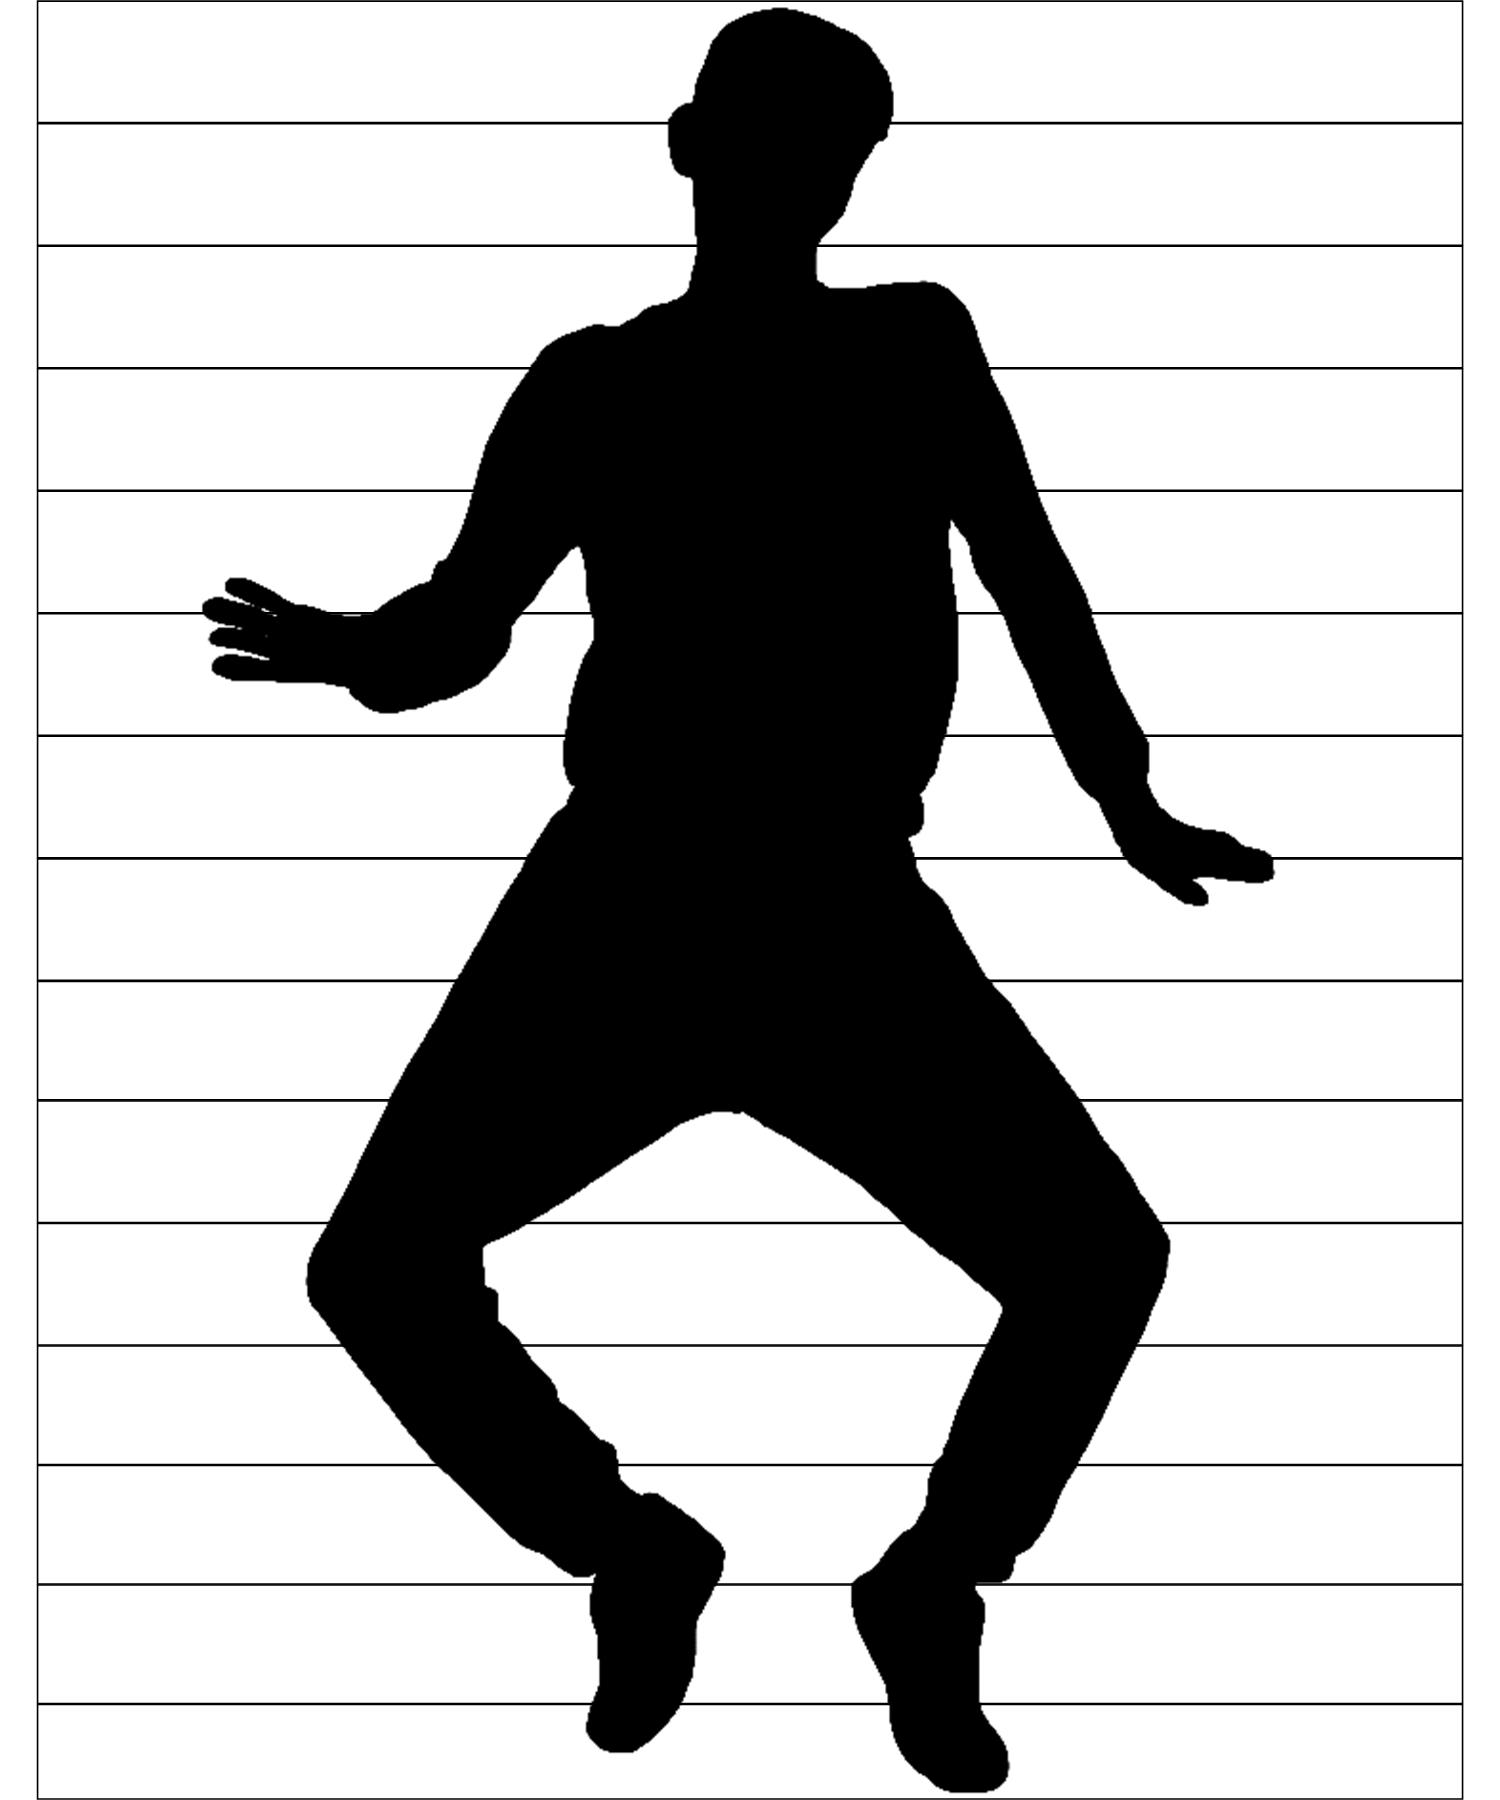
Next came the dancer sihouettes. I had originally proposed photographing the dance students myself. However turned out the school had just had their Year-End-Performance professionally photographed and were happy to let me sift through the existing photographs. The only problem? There were over 6000 photographs I would need to sift through!
Why would I need to sift through all 6000+ photos? Because not every photo or pose turns into a successful silhouette. The shape of the sihouette has to clearly convey the dancer's motion, intent, and dance-style and most photo angles just dont work. I was also keen to tap into the diversity of the school's students (genders, ethnicities, body-types, etc) and this required going through all the photos with an eagle eye.
A couple of sifting days later, I had a set that would work. The next step was to convert each dancer into a sihouette. Easier said than done!
For the next couple of days, I sat on my workstation, painfully tracing the outline of each dancer and then converting the shape into a silhouette. Let's just say I am not keen to repeat this part of the project - like, ever!
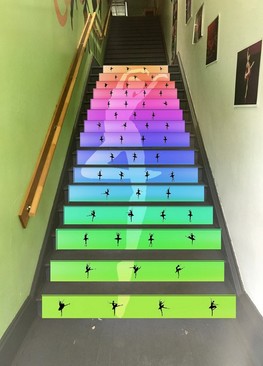
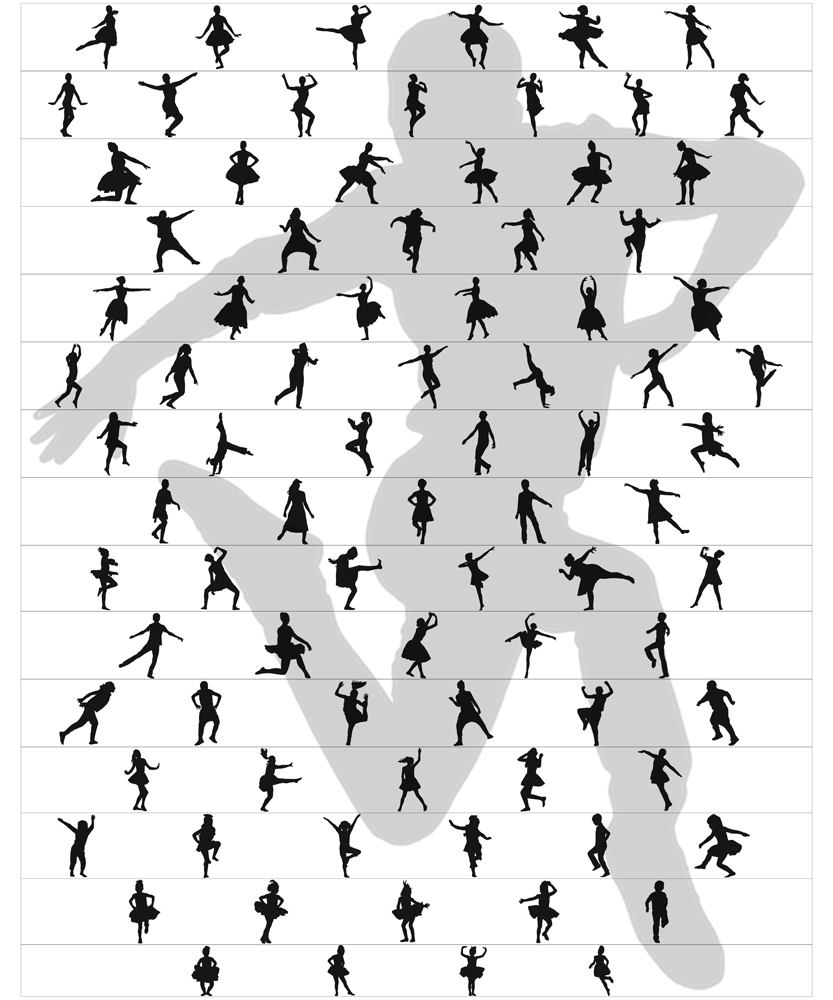
Once I had my silhouettes, I needed to design the actual staircase mural to scale. For this, I recruited Microsoft Publisher, creating a 5'x6' document and inserting and placing all 80(!) silhouettes in it.
Why would I need to sift through all 6000+ photos? Because not every photo or pose turns into a successful silhouette. The shape of the sihouette has to clearly convey the dancer's motion, intent, and dance-style and most photo angles just dont work. I was also keen to tap into the diversity of the school's students (genders, ethnicities, body-types, etc) and this required going through all the photos with an eagle eye.
A couple of sifting days later, I had a set that would work. The next step was to convert each dancer into a sihouette. Easier said than done!
For the next couple of days, I sat on my workstation, painfully tracing the outline of each dancer and then converting the shape into a silhouette. Let's just say I am not keen to repeat this part of the project - like, ever!
Once I had my silhouettes, I needed to design the actual staircase mural to scale. For this, I recruited Microsoft Publisher, creating a 5'x6' document and inserting and placing all 80(!) silhouettes in it.
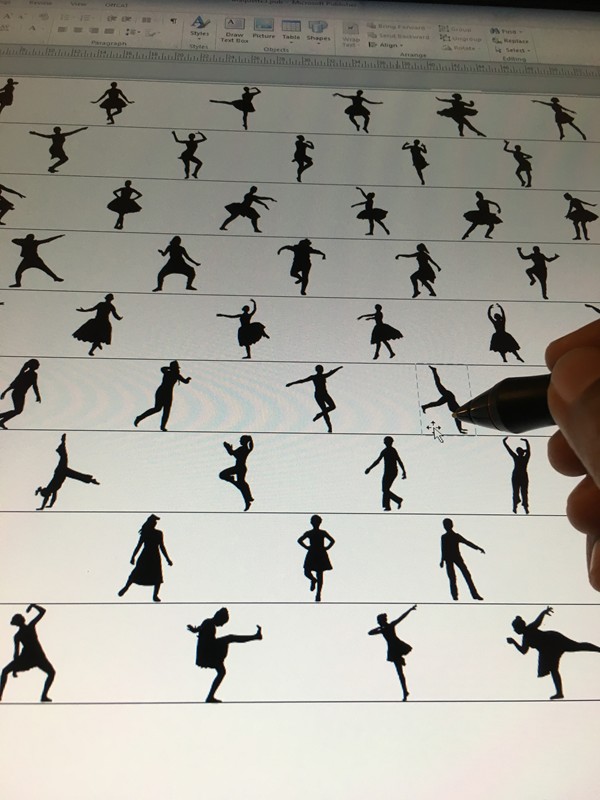
(If you're paying close attention, you'll see the diversity, and also the fact that each row in the image above represents a different dance style).
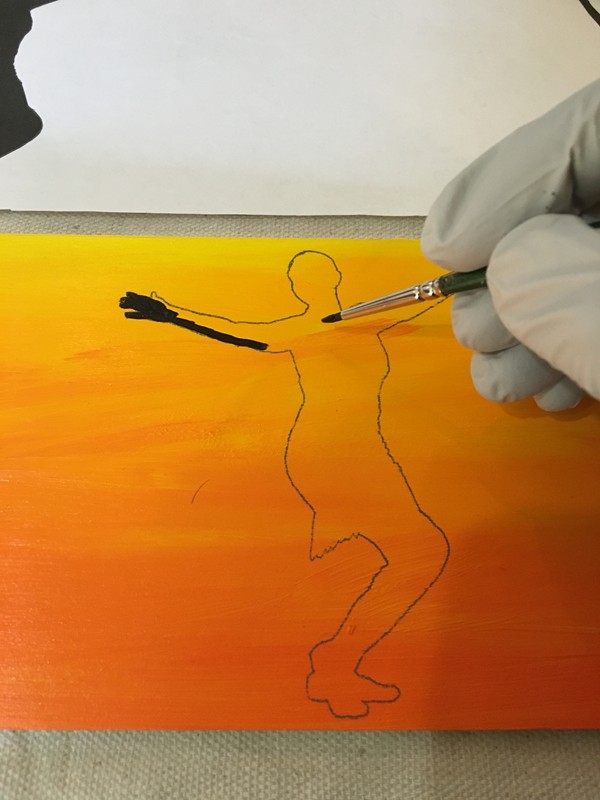
To go from computer silhouette to painted panel, I would need to print the silhouettes at real size, then trace them onto the panels one by one, and then paint each silhouette figure carefully. Very, very carefully!
To go from computer silhouette to painted panel, I would need to print the silhouettes at real size, then trace them onto the panels one by one, and then paint each silhouette figure carefully. Very, very carefully!
To print out my design at full scale, I went to a place with large-sized printers: Kinko's. Well, a couple of Kinko's. Each of whom kept messing up the printing. It took many iterations to get my designs printed. Oh Kinko's, that's 4 hours of my life I'm never getting back!
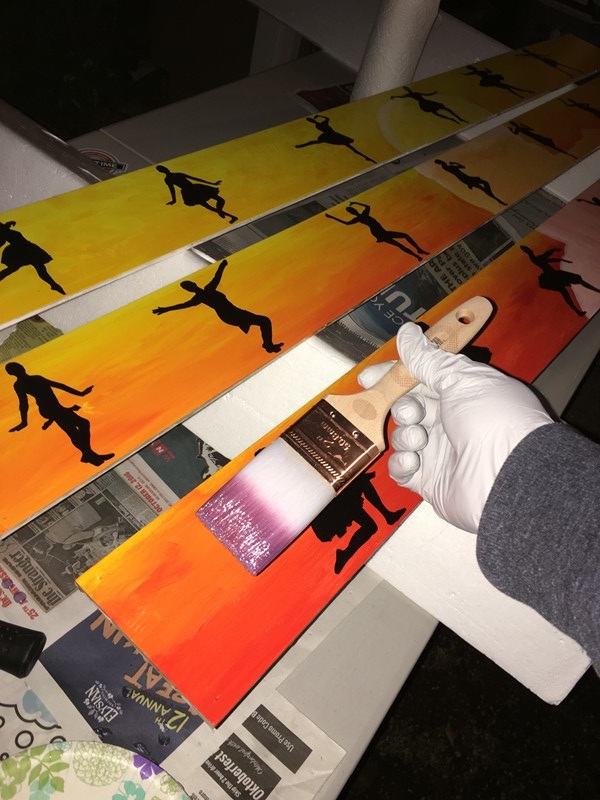
Designs in hand, I could now proceed with painting each panel. This is what it looks like, speeded up:
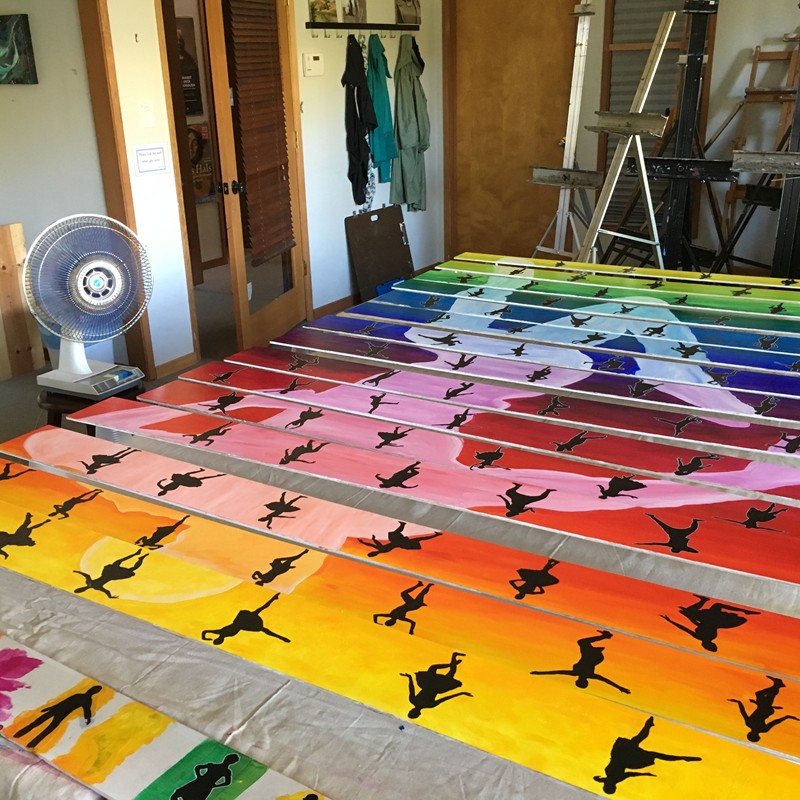
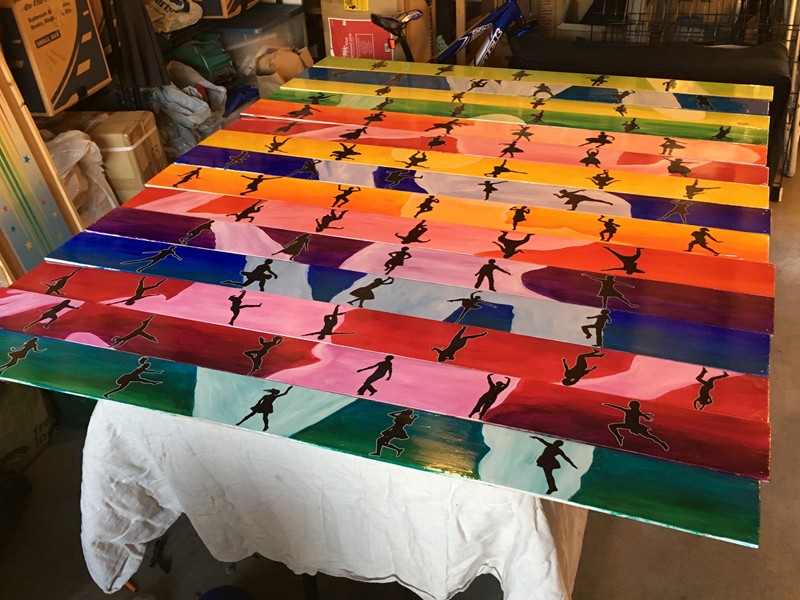
15 panels later:
Notice some of the panels are slightly raised? That's warping in action for you. Thankfully this can be easily fixed at install time.
Here's a quick closeup of the dancer silhouettes. Quick, can you count them all?
Here's a quick closeup of the dancer silhouettes. Quick, can you count them all?
Once the panels are painted, the paint needs to be protected from the environment - and since these are staircase risers, from contact with shoes.
The first step of the process was to seal in the paint with two layers of transparent acrylic paint polymer (it's basically paint without any pigment - so it behaves just like paint and binds to the underlying paint very well), followed by three coats of anti-scuff coating for a total of 5 protective layers between the paint and the errant shoe.
The first step of the process was to seal in the paint with two layers of transparent acrylic paint polymer (it's basically paint without any pigment - so it behaves just like paint and binds to the underlying paint very well), followed by three coats of anti-scuff coating for a total of 5 protective layers between the paint and the errant shoe.
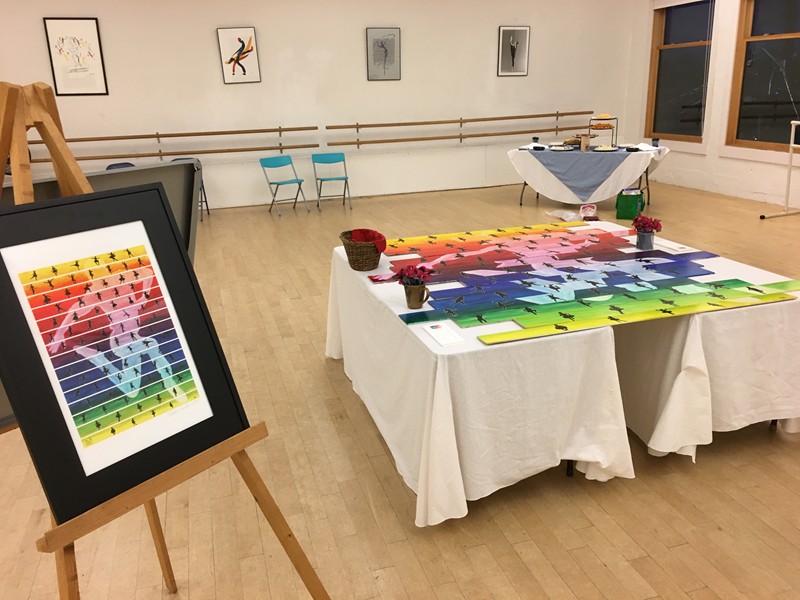
The panels were now in a ready state. For the fund-raising activities related to the project, I proposed creating a signed limited-edition poster of the finished mural to be presented to each donor who sponsored a step as a commemorative token of their sponsorship. This required having the panels professionally photographed, which would be challenging given their size and shape, a challenge met in spades by Bellevue Fine Art, my favorite go-to fine-art scanning company. Once I had the professional scans in hand, I created the following poster:
With poster and panels ready, we did a formal unveiling at the school:
And then finally, it was time to install the mural:
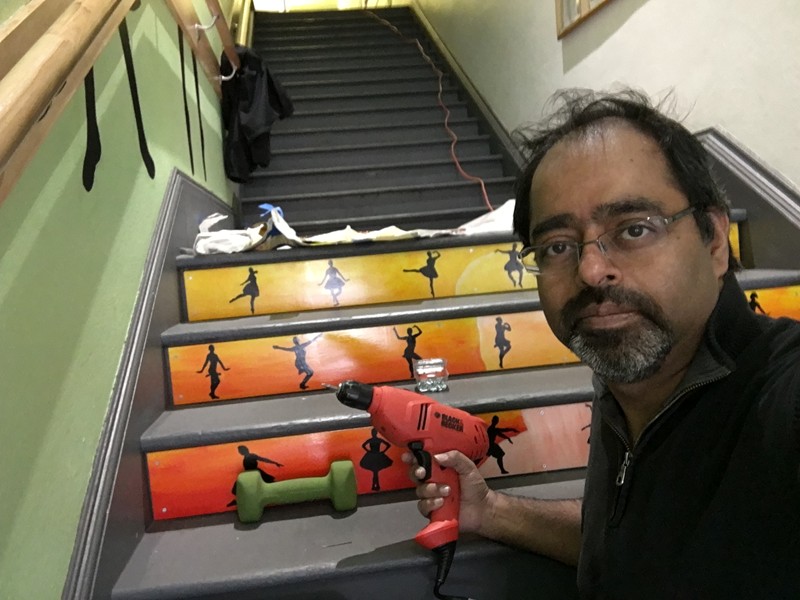
"License To Drill"
There you have it - from proposal to installed mural - a 6 month journey!
To follow along with my public art projects in real time, I invite you to 'LIKE' my Facebook Art Page or follow me on Instagram @ArtByVikram,
 RSS Feed